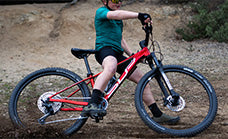
A Beginner’s Guide to Teaching Your Child to Ride a Balance Bike

Introducing young children to cycling can be a delightful milestone, and balance bikes have become a popular first step in this journey. Unlike traditional bicycles, balance bikes do not have pedals. Instead, they rely on a child's feet to move forward and maintain balance. This simple design is more than just fun; it plays a crucial role in a child’s development.
Benefits of Starting with Balance Bikes:
- Enhanced Coordination and Balance: Balance bikes teach young riders to maintain stability on two wheels, improving their coordination and motor skills naturally and effectively.
- Ease of Transition to Pedal Bikes: Children who start on balance bikes typically find it easier to progress to pedal bikes. They skip the training wheels stage, as they've already mastered balancing.
- Boosted Confidence and Independence: The control it offers allows children to explore cycling at their own pace, boosting their confidence and fostering a sense of independence.
Why Balance Bikes?
- Balance bikes are designed for accessibility; their low height ensures that even toddlers can use them safely as soon as they can walk.
- They promote physical activity and outdoor play, crucial for healthy childhood development.
- The simplicity of balanced bikes makes them easy to maintain and a hassle-free introduction to biking for parents and children alike.
In this blog, we’ll guide you through each step of teaching your child to ride a balanced bike, from selecting the right one to transitioning them to their first pedal bike, ensuring the process is as enjoyable and rewarding as possible.
Choosing the Right Balance Bike
Selecting the perfect balance bike is a crucial step in ensuring your child's safety, comfort, and enjoyment. Here’s what to consider when picking a balance bike:
Key Features to Look For
- Adjustable Seat and Handlebars: Flexibility in adjusting the height of the seat and handlebars is vital as it allows the bike to grow with your child, ensuring a comfortable and ergonomic fit over time.
- Lightweight Frame: A lightweight frame made from materials like aluminium ensures that the bike is easy for your child to handle and manoeuvre without strain.
- No Pedals: The absence of pedals is what defines a balance bike. This design encourages children to focus on balancing and steering first, without the complexity of pedalling.
Safety Considerations
- Well-Constructed Bike: A sturdy construction helps prevent accidents caused by structural failures. Ensure the bike frame and components are robust and securely assembled.
- Brakes: While not all balance bikes come with brakes, they can be a good feature for safety as they teach children the fundamentals of stopping a bike safely before they transition to pedal bikes.
- Tyre Quality: Check that the tyres are high-quality and durable. Pneumatic (air-filled) tyres offer better traction and cushioning on various surfaces compared to solid tyres and are preferable for comfort and safety.
Sizing Guide
- Height and Inseam: The most important measure is the inseam length. Ensure that your child can stand over the bike with both feet flat on the ground. There should be a 1 to 1.5 inches clearance between the bike frame and your child's crotch when they stand over it.
- Age Considerations: Balance bikes are generally suitable for children from 18 months to 5 years old, but always choose based on the child's height rather than age to ensure a proper fit.
Preparing to Ride
Once you've chosen the right balance bike, preparing your child for their first riding experience is key to ensuring safety and enjoyment. This involves equipping them with the necessary safety gear, choosing the right location, and preparing them emotionally for a new adventure.
Safety Gear
- Helmet: A well-fitted helmet is the most critical piece of safety gear. Ensure it meets safety standards and fits snugly on your child's head.
- Knee Pads and Elbow Pads: These provide extra protection against scrapes and bruises, which are common as children learn to balance and ride.
- Wrist Guards (optional): While not as essential, wrist guards can offer additional protection, especially in the early stages of learning to ride.
Choosing a Location
- Flat and Smooth Surface: Begin in a safe, flat area with a smooth surface that will not overly challenge your child’s balance skills. This could be a quiet park path, an empty car park on the weekends, or a broad, flat driveway.
- Safe Environment: Ensure the area is away from traffic, large crowds, and other hazards. A controlled environment will help your child focus on learning without unnecessary distractions or dangers.
- Space for Maneuvering: Choose a location that offers enough space for your child to manoeuvre comfortably and safely. This will allow them to practise starting, stopping, and turning without constraints.
Emotional Preparation
- Encouragement and Support: Offer lots of encouragement. Learning to balance and ride can be challenging, and your support will help build their confidence.
- Set Realistic Expectations: Let your child know that it’s okay to feel uncertain and that falling is part of learning. Celebrate small achievements to keep their spirits high.
- Make it Fun: Try to make the learning process as fun as possible. You can use games, challenges, or even a story to engage your child’s interest and reduce any anxiety they might feel.
Teaching the Basics
Introducing your child to the basics of riding a balance bike involves several progressive steps, starting from walking the bike to eventually gliding and steering confidently. Here's how to guide your child through these foundational skills effectively.
First Steps with a Balance Bike
Walking the Bike: Start by having your child walk alongside the bike, holding the handlebars to steer as they walk. This helps them get a feel for the bike's weight and balance without the added challenge of sitting on it.
Sitting and Walking: Once comfortable, encourage your child to sit on the bike while continuing to walk. Adjust the seat height so they can comfortably touch the ground with both feet, which provides stability and control as they move.
Gradual Progression to Scooting: As your child gains confidence, they can start using their feet to scoot along, still sitting on the bike. This is a natural progression towards developing the balance needed for gliding.
Learning to Glide
Encourage Longer Strides: Once your child is comfortable scooting, encourage them to take longer strides, which will naturally lead to moments where both feet are off the ground, and they are balancing on the bike.
Practice Lifting Feet: Gradually, have your child practice lifting their feet and balancing for short periods. Start with brief glides and increase the duration as their confidence and balance improve.
Safe Falling Techniques: Teach your child safe ways to fall or stop the bike using their feet, minimizing the risk of injury and reducing any fear associated with falling.
Turning and Steering
- Basic Steering Practice: Begin steering practice in a safe, open area. Teach your child to gently turn the handlebars in the direction they want to go while walking or scooting the bike.
- Using Body Weight: As they become more adept at balancing, instruct them to use their body weight to assist in steering. Leaning slightly into turns helps in making smoother and safer turns.
- Practice Makes Perfect: Set up a simple course with cones or other safe markers that require turning around obstacles. This will help them practice steering and turning skills in a fun and engaging way.
Building Confidence and Skills
As your child becomes more familiar with their balance bike, the focus shifts to building their confidence and enhancing their riding skills. Regular practice, engaging activities, and positive reinforcement are key components in this developmental stage.
Practice Makes Perfect
- Consistent Practice: Encourage your child to ride their balance bike regularly. Frequent practice helps reinforce their skills and boosts their comfort level on the bike.
- Patience is Key: Every child learns at their own pace. Maintain patience and provide constant encouragement to keep the learning experience positive and pressure-free.
- Set Achievable Goals: Create small, manageable goals for each practice session, which can help your child see their progress and stay motivated.
Games and Challenges
- Obstacle Courses: Set up simple obstacle courses with cones or soft barriers. These can teach control and precision as your child learns to navigate around them.
- Scavenger Hunts: Organize mini scavenger hunts where your child has to ride to different locations to collect items or spot certain objects. This makes learning an adventure.
- Balance Challenges: Incorporate balance games, such as seeing how long they can glide without touching the ground or riding along lines or patterns drawn on the ground.
Recognizing Milestones
- Celebrate Small Successes: Acknowledge and celebrate even the small victories, such as a longer glide or a successful turn. This reinforces their sense of accomplishment.
- Positive Feedback: Offer plenty of praise and positive feedback. Highlight what they’re doing well, not just what needs improvement.
- Memory Making: Consider keeping a photo or video diary of their progress. Watching themselves improve over time can be a powerful confidence booster for your child.
Transitioning to a Pedal Bike
Moving from a balance bike to a pedal bike is a significant milestone in your child's cycling journey. Recognizing when they're ready and supporting them through this transition can help ensure a smooth and enjoyable experience. Here’s how to guide your child through this exciting phase.
Knowing When They’re Ready
Balance Proficiency: Your child should be comfortably gliding on their balance bike, demonstrating good control, balance, and the ability to steer effectively.
Interest in Pedalling: They may show interest in bikes with pedals, either through curiosity about how they work or a desire to try one.
Physical Readiness: Ensure your child is physically capable of operating a pedal bike, which includes being able to reach and operate the pedals, and handle the added weight and complexity.
Making the Transition
Choosing the Right Bike: Select a pedal bike that is the appropriate size. Ensure your child can stand over the bike with both feet flat on the ground, and reach the handlebars and brakes comfortably.
Adjustments Needed: Initially, you might consider removing the pedals and letting your child use the bike as a balance bike to get used to the new size and weight.
Introducing Pedals: Once they are comfortable, reattach the pedals. Teach them to pedal on a flat, safe surface where they feel confident. Support them physically if needed, by holding the back of their seat as they pedal.
Continued Support
Encouragement and Patience: Transitioning to a pedal bike can be challenging. Continue to provide plenty of encouragement and be patient as they learn.
Keep It Fun: Continue to make cycling a fun activity. Avoid putting pressure on mastering the pedal bike quickly and let them learn at their own pace.
Safety First: Reinforce the importance of wearing a helmet and proper safety gear, and ensure your child understands basic safety rules for biking.
Conclusion
Teaching your child to ride a balance bike is an exciting journey that lays the foundation for a lifetime of cycling. From selecting the right balance bike to transitioning to a pedal bike, each step builds crucial skills and confidence.


