


Dialing In Your Bike Fit for Maximum Speed & Comfort
|
|
Time to read 4 min
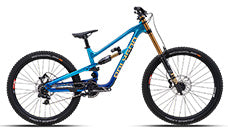
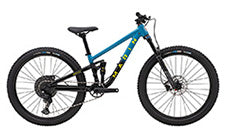
Buying a new bike is only the first step to comfortable riding. To get the most out of it you needto make sure the saddle, bars and controls are adjusted to suit your body. In this guide I’ll showyou how I dial in my bike fit at home using a few simple tools so that I can ride longer andavoid aches and pains.
Table of Content
Summary: Start with your saddle level and use a builder’s level or broom handle to measure your inseam.Multiply that measurement by roughly 0.883 to get a good starting saddle height[1]. Anotherquick method is to sit on the bike and adjust the seat until your leg has a slight bend when theheel is on the bottom pedal[3]. Set the saddle fore/aft in the middle of the rails, fine-tune reachwith stem length and bar roll, and adjust your brake levers so you can reach them comfortablyand the levers sit nearly parallel to the bars[2]. Make one change at a time and test ride – smalltweaks make a big difference.
Tools you’ll need
- Builder’s level or broomstick/dowel: For measuring your inseam and checkingsaddle level.
- Measuring tape: To record inseam and mark seatpost height.
- Multi-tool: To loosen bolts on your saddle, stem and brake levers.
- Electrical or masking tape: Handy for marking seatpost height when using a dropper.
Step-by-step bike fit
1. Level the saddle
Before adjusting anything else, make sure your saddle is level. Place a book or straightedge ontop and use a carpenter’s level or a level app on your phone to check. A level saddle is a neutralstarting point; you can experiment with slight tilt later once you know what feels comfortable.
2. Find the right saddle height
There are two easy ways to estimate saddle height:
- Inseam method: With bare feet, stand against a wall and hold a builder’s level or broomhandle snugly against your sit bones, parallel to the floor. Measure from the top of the level tothe ground, then multiply your inseam by approximately 0.883 – this gives a starting point forsaddle height[1]. For example, a 75 cm inseam × 0.883 ≈ 66 cm from the centre of your bottombracket to the top of the saddle. Go slightly lower rather than higher if you’re new to riding.
- Heel-on-pedal method: Sit on your bike and place your heel on the pedal at the bottom of itsstroke (six o’clock). Adjust the seat until your leg is fully extended with your heel on the pedal.When you pedal normally with the ball of your foot over the axle, your knee will have a slightbend at the bottom of the stroke[3]. Mark this height on the seatpost with tape if you use adropper post so you can return to it easily.
3. Set saddle fore/aft
Start with the saddle positioned in the middle of its rails. If you find yourself sliding forwardduring rides, move the saddle slightly back; if you constantly scoot rearward, move it forward alittle. Fine-tune until you feel balanced over the pedals. A plumb-line check can also help: withthe pedals level, drop a line from just below your kneecap; it should intersect the pedal axle.
4. Adjust reach and handlebar position
Reach influences how upright or aggressive your riding position feels. As a general guideline,trail riders tend to have their torso angled between 30 and 50 degrees from vertical, with agentle bend in the elbows. If you feel cramped, consider a longer stem; if you’re too stretched,try a shorter one. You can also rotate the bars slightly forward or backward to raise or loweryour hands and elbows.
5. Dial in controls
Brake levers and shifters are small components that make a big difference in comfort. Adjustthe reach screw on your brake levers so you can comfortably wrap one or two fingers over themwithout lifting your hands off the grips[2]. The levers should be nearly parallel to the barswhen the brakes start to bite and should never touch the grips[2]. Loosen the clamp bolt androtate the levers so there’s a straight line from your forearm through your wrist to yourfingers[2]. This prevents wrist strain and helps your hands stay relaxed on long descents.Repeat the process for the gear shifter if needed[2].
Who is this for?
Anyone who has just bought a new bike or feels uncomfortable on their current setup willbenefit from a basic bike fit. Spending a few minutes adjusting saddle height, fore/aft, reachand controls can prevent knee and back pain and make climbing and descending much moreenjoyable. Even kids and casual riders will notice the difference when their levers are withineasy reach and the saddle height allows efficient pedalling.
How do I know if my saddle height is correct?
A quick rule of thumb is to use your inseam× 0.883 as a starting point[1]. When riding, your knee should have a slight bend at the bottom ofthe pedal stroke[3]. If your hips rock side to side or you feel knee pain, lower the seat slightly.
Can I tilt my saddle nose up or down?
Begin with the saddle level. Nose-down tilts canrelieve pressure on sensitive areas but may cause you to slide forward; nose-up tilts can givesupport on climbs but might put extra strain on your lower back. Make small changes and testthem on a ride.
What’s the best way to position brake levers?
Adjust lever reach so you can comfortablybrake with one or two fingers without removing your hands from the grips[2]. The leversshould sit close to parallel with the bars when they first engage, and the angle should follow astraight line through your forearm to your fingers[2].
Do I need a professional bike fit?
A pro fit can be worthwhile for serious racers or riderswith persistent pain, but most of us can get very close with DIY methods. Use these techniquesas a starting point and fine-tune based on how you feel.

Jared Morgan
BikesOnline....


