


Learning to Mountain Bike – Top Beginner Tips
|
|
Time to read 4 min
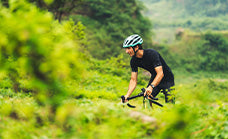
As someone who grew up watching mountain bikers fly down trails but never had the chanceto try it myself, I was equal parts nervous and excited to finally get my first proper MTB. Withthe help of my colleague and coach Fiona, I set up the bike, hit the trails and learned thefundamental skills that every new rider should know. These simple tips made my first ridessafe, fun and confidence-inspiring.
Table of Content
Summary: Starting out in mountain biking can feel intimidating, but a few key fundamentals make all thedifference. Before you ride, adjust your saddle so that your leg has a slight bend at the bottom ofthe pedal stroke and lower it a couple of inches for descents[4]. On the trail, keep your pedalslevel, elbows and knees slightly bent and one finger on each brake lever to stay balancedand ready for obstacles[1]. When the terrain turns steep or technical, move into theready/attack position by deepening the bend in your knees and elbows and shifting yourhips back[2]. Apply your brakes evenly and avoid grabbing a handful of front brake[3]. Finally,scan the trail ahead, pick a line and lower your seat with a dropper post for rollers and drops.These basics will help you ride smoother and safer from day one.
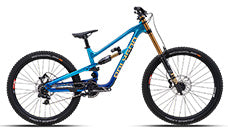
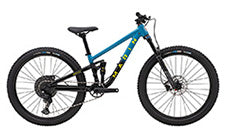
Entry-Level Mountain Bikes
Getting set up
The first step before hitting the dirt is dialing in your bike. Fiona showed me how to set mysaddle height for efficient pedalling: when your foot is at the bottom of the stroke, your legshould be about 80–90 percent extended[4]. For climbs, this high saddle lets you generatepower and maintain traction. But when it’s time to descend, drop your seat two or threeinches to lower your centre of gravity and give yourself more room to move[4]. If your bike hasa dropper post, you can adjust the height on the fly with a simple lever.
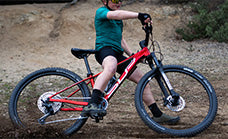
Body position and balance
On flat or non-technical sections you want to ride in a neutral position: level pedals, a slightbend in your knees and elbows and your index fingers resting on the brake levers[1].Keeping your eyes focused 15–20 feet ahead helps you anticipate obstacles and stay smooth onthe trail[1]. This neutral stance allows you to transition quickly into the ready position whenthe terrain changes.When the trail gets steeper or rougher, it’s time to adopt the ready (attack) position. Thismeans deepening the bend in your knees and elbows, lifting your rear off the saddle andshifting your hips back so your back is almost parallel to the ground[2]. Your pedals shouldremain level and your index fingers stay on the brakes[2]. Fiona calls this your “firstsuspension” because bending your arms and legs lets your body absorb impacts instead ofgetting knocked around.
Mastering braking and controls
Braking is more than just squeezing the levers. Most of your stopping power comes from thefront brake, but grabbing it too hard can send you over the bars. Fiona taught me to apply thebrakes consistently and evenly, using one finger on each lever and avoiding suddensqueezes[3]. While braking, move your hips back, drop your heels and keep a slight bend inyour knees and elbows[3]. This body position keeps your weight balanced and prevents youfrom pitching forward on steep descents. Remember to look ahead and modulate your speedbefore entering corners or technical sections.
Reading the trail
New trails can be daunting, so we often walk unfamiliar sections first to identify the best lineand spot any hazards. When you’re riding, keep your pedals level to avoid striking rocks orroots. If you’re unsure about a feature like a drop or roller, Fiona suggested lining up two sticksas a guide for your front wheel and rolling between them to gauge the angle. Lower your saddleand push your hips back over the rear wheel to keep your weight balanced as you roll through.
Dropper posts and gear
A dropper post is a game changer for new riders. Being able to quickly lower your seat out ofthe way gives you more room to manoeuvre on descents and makes learning rollers and dropsmuch easier. Good gloves, a helmet, knee pads and a multi-tool are must-have items forbeginners. I also carry a small first-aid kit and snack so I’m prepared for anything the trailthrows at me.
Who is this for?
If you’re new to mountain biking or teaching a friend to ride, these fundamentals will set youup for success. The techniques we practised—proper saddle height, neutral and ready positions,controlled braking and trail awareness—are useful for riders of all ages and fitness levels. Don’tworry about speed at first; focus on staying relaxed, looking ahead and building confidence.With practice you’ll quickly progress from cautious beginner to confident trail rider.
Why should I keep my pedals level when not pedalling?
Keeping your pedals level and evenly weighted helps you maintain balance and avoid strikingrocks or roots. A slight bend in your knees and elbows and your index fingers on the brakelevers keep you ready for obstacles[1].
What is the attack position and why is it important?
The ready or attack position involves a deep bend in your knees and elbows, your hips shiftedback and your rear off the saddle[2]. It allows your body to act as suspension, absorbingimpacts and keeping you stable when the trail gets steep or rough.
How should I use the brakes on a mountain bike?
Apply your brakes smoothly and evenly, using primarily one finger on each lever[3]. Avoidgrabbing a handful of front brake. Shift your hips back, drop your heels and keep a slight bendin your knees and elbows to stay in control[3].
Why lower the seat for descents?
Dropping your seat by two or three inches lowers your centre of gravity, giving you more roomto move and more confidence on steep descents[4]. A dropper post makes this quick and easy.
Do I really need to walk trails before riding them?
Walking a new trail helps you see potential hazards and pick the best line. It’s a great way tobuild confidence and avoid surprises when you ride.

Jared Morgan
BikesOnline....


